How To Make A Church Directory (DIY vs Software) PLUS Free Templates


Ask "What Job Does Our Directory Have?": Deciding between a DIY Google Sheets directory or specialized software starts with what you need your directory for.
Maintenance is HUGE: A current directory keeps everyone informed and engaged. An out-of-date one is virtually useless.
Simplicity or Capacity: Google Sheets offers simplicity and low costs. Directory software better serves growing churches.
Consider Data Security: Church directory software offers enhanced security, privacy, and encryption. Google Sheets is far more limited.
An outdated or poorly maintained church directory isn’t just an inconvenience—it actively harms your ministry. When your membership contact info is wrong or scattered across multiple files, real people slip through the cracks.
- Volunteers don’t get the notifications they need.
- Shut-ins go unseen.
- Newcomers feel ignored.
And worst of all? You often don’t realize the damage until it’s too late. These issues happen because managing church contacts manually gets messy fast. Without a structured system, updates get lost, people change numbers, and suddenly, you’re scrambling to track down basic information.
That’s why it’s essential to set up your church directory the right way from the start. In this guide, I’ll walk you through how to make a church directory—comparing Google Sheets to dedicated church directory software—so you can choose the best option for your church.
(And if you’re curious about how to streamline all your church activities, be sure to check out our article on What is Church Management Software.)
What Is A Church Directory?
A church directory is more than just a list of church member names and numbers; it can help keep your church records well-managed and be a vital tool for building community and staying connected in your church.
Struggling to remember who’s who or track down volunteers for the upcoming event? A well-organized church directory can save the day by making it easy to find and reach out to members. A church directory helps manage volunteers efficiently. As well, church directories can vary quite a bit depending on how a church is organized.
We're going to compare two primary methods of directory development:
- How to Create a Church Directory: Google Sheets Version
- How to Create a Church Directory: Automated Software Version
Comparing Google Sheets & Directory Software?
In the end, selecting the right church directory option for your church can feel daunting. Ultimately, it’s all about finding the best fit for your congregation's needs.
- If your church is smaller and you need a straightforward, cost-effective solution, using Google Sheets could be a great start.
- If you have a bit of a budget and more complex organizational needs, you may need to consider more robust directory software.
| Criteria | Google Sheets | Church Directory Software |
| Setup Costs | Free. | Varies: some initial setup costs (subscription to software) |
| User-Friendliness | Difficult: only manual updates are possible. Error-prone interface. | Strong: with easy navigation for both administrators and end-users. |
| Accessibility to Church Members | Poor: Access by freely shareable link. Limited ability to restrict permissions. | Excellent: accessible by app or website. Users create profiles. Flexible permissions. |
| Ease of Updates | Difficult: updates must be done manually by admins. | Easy: Automated updates. Members update their own info. |
| Member Management | Difficult: only manual updates possible. Error-prone interface. | Easy: members manage their own profiles. Admins assign roles, groups, and communication features. |
| Data Protection and Access Control | Poor: Limited to Google’s privacy and security settings; risk of unauthorized access if links are shared widely. | Strong: Enhanced security with customizable access levels, encryption, and compliance with data protection regulations. |
| Integration with Communication Tools | None. | Good: software integrates with email, text, and messaging platforms, allowing targeted communications directly from the directory interface. |
| Reporting and Analytics | None. | Strong: Offers robust reporting and analytics, providing insights into church member engagement and attendance trends. |
| Security and Privacy Controls | Strong: built-in controls, encryption, and audit trails. Sensitive member information is carefully protected. | Strong: built-in controls, encryption, and audit trails. Sensitive member information carefully protected. |

15 Steps to Create A Church Directory with Google Sheets
While creating your church directory using Google Sheets isn't exactly simple, I've worked to make this approach as practical and straightforward as possible. All that being said:
- This process is detailed and requires an intermediate skill level with Google Sheets.
- I believe in you.
- If you don't have the time or energy for this... skip ahead to the part where we discuss the software tools that make this a lot easier.
Step 1: Gather and Organize Data on Key People (Staff, Volunteers, Members)
Start by compiling a complete list of all the church members you want to include in your directory. Gather their names, contact details, roles, and any other relevant information.
- For members, you might include addresses, phone numbers, emails, birthdays, anniversaries, family members, join dates, small groups, interests, and skills.
- For staff, collect names, contact info, titles, departments, birthdays, hire dates, and other work-related details.
- For volunteers, gather names, contact info, volunteer roles, departments, skills, interests, and availability.
Organize this information into categories to clarify what you want to capture and manage in your church directory.
Step 2: Create a New Google Sheets File Titled “Church Directory.”
Log in to your Google account and navigate to Google Sheets. Open a new blank spreadsheet and title it "Church Directory." This will be your main document for storing all member records.
Add column headers to help you organize the key pieces of information for each congregation member. Each header should indicate the type of information you want to include, for example:
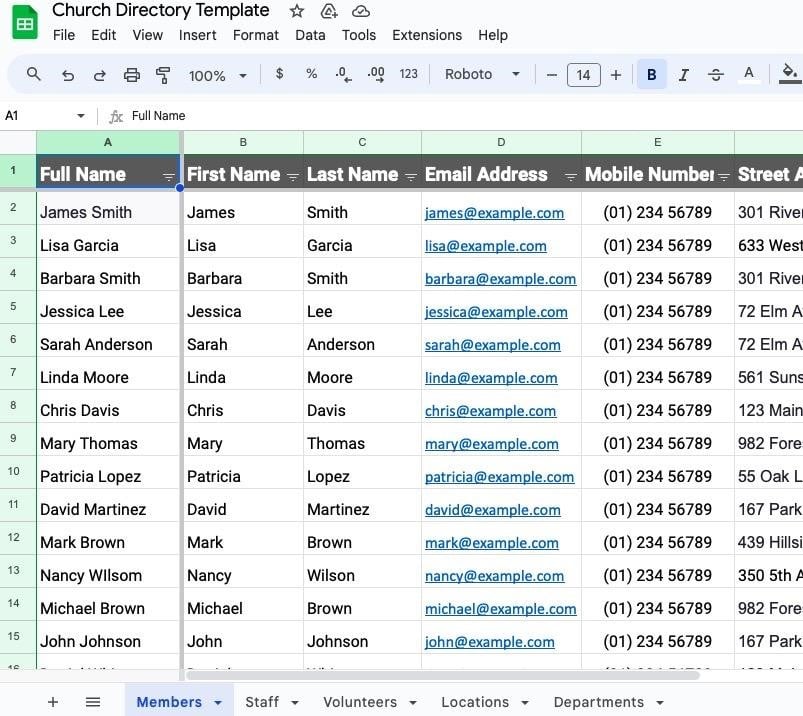
- In cell A1, type "Full Name"
- In cell B1, type "First Name"
- In cell C1, type "Last Name.
- In cell D1, type "Email"
- And so on...
Fill the topmost cell in each column with the other information that you wish to track (e.g., cell phone, home address, birthday, etc.).
Step 3: Within that same file, create a new sheet titled ‘Staff’
At the bottom left of the Google Sheet you will see a '+'. Click this to create a new sheet and name it "Staff Directory." This will be used to store all the contact information and details of your staff.
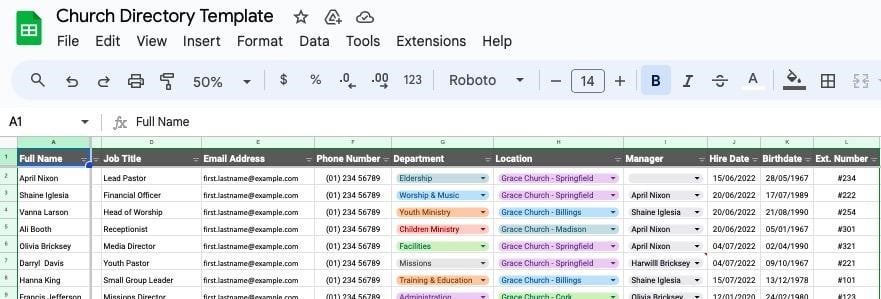
Add Column Headers for your Staff Directory. These headers will help you organize the key pieces of information for each staff member.
- In cell A1, type "Full Name."
- In cell B1, type "First Name."
- In cell C1, type "Last Name."
- In cell D1, type "Job Title."
- In cell E1, type "Email Address."
- And so forth...
I'd recommend including the phone number, ministry/department, location, to whom they report, etc.
Step 4: Next, create an additional spreadsheet titled ‘Volunteers’
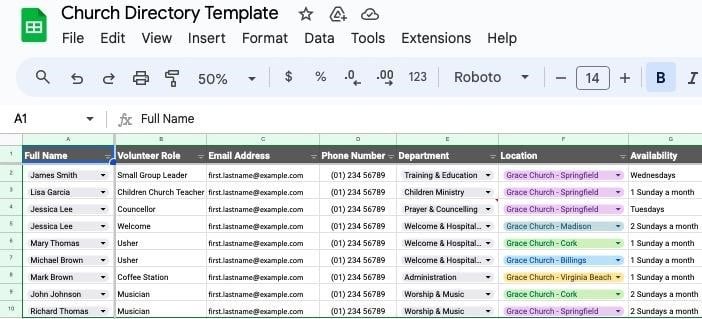
Create another new tab in your spreadsheet for your church volunteers, labeled "Volunteers Directory." As before, add Column Headers for Volunteers. These headers will help you organize the key pieces of information for each volunteer.:
- In cell A1, type "Full Name"
- In cell B1, type "Volunteer Role"
- In cell C1, type "Email Address"
- In cell D1, type "Phone Number"
- In cell E1, type "Department"
- In cell F1, type "Location"
- Etc.
Step 5: Create a new spreadsheet titled ‘Locations’
Create a new tab in your spreadsheet titled "Locations" to keep track of all your church campuses, buildings, and meeting places.
Add Column Headers for Locations Directory. This setup provides a directory of all your church locations, helping you manage and organize essential details for each:
Again, use labels that suit your church.
- In cell A1, enter "Location Name."
- In cell B1, enter "Street Address."
- In cell C1, enter "City."
- In cell D1, enter "State."
- In cell E1, enter "Country."
- In cell F1, enter "ZIP / Postal Code."
- In cell G1, enter "Phone Number."
- And so on...

Step 6: Create a new spreadsheet titled “Departments”.

Create a new tab in your spreadsheet labeled "Departments" to centralize all your church departments.
Add Column Headers for the department directory. This setup provides a directory of your church departments, allowing for organized management and clarity on departmental information.
- In cell A1, enter "Department Name."
- In cell B1, enter "Department Head."
- In cell C1, enter "Locations."
- In cell D1, enter "Department Goals."
- In cell E1, enter "Description."

Step 7: Connect Locations Dropdown in Staff, Members, and Volunteers Spreadsheets
For this section, we'll use some slightly advanced Google Sheet functionalities. If this feels too advanced or difficult, I recommend skipping this section and jumping straight to the software tools that automate church directory setup.
Now, we're going to make each of the sheets you set up talk to each other, basically. I'll walk you through the process of setting up integrations and connecting the "Locations" sheet to the Staff, Members, and Volunteers Directories using data validation.
1. Return to the "Members" sheet.
- Highlight the Locations column (Column M).
- Navigate to Data > Data Validation > Add New Rule.
- Ensure Apply to Range is set to = 'Members'!M2:N1000
- Under Criteria, select 'Dropdown (from range).'
- Enter =Locations!A2:A
- Click 'Done.'

2. Repeat these steps for both the Staff and Volunteers sheets we created together.
Step 8: Connect Departments Dropdown in Staff and Volunteers Sheets.
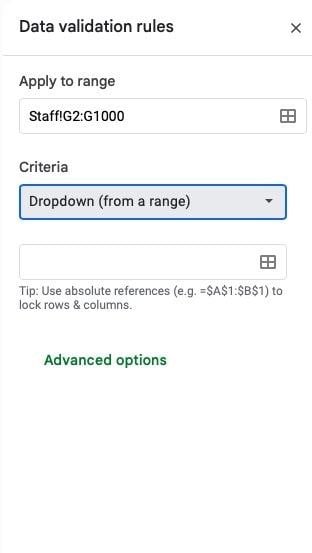
Utilize data validation to establish drop-down menus for "Departments," sourcing from your dedicated "Departments" spreadsheet.
- Go back to the "Staff" sheet
- Highlight the Department column (Column G)
- From the menu, select Data > Data Validation > Add New Rule
- Apply to Range must = Staff!G2:G1000
- Under Criteria, select the 'Dropdown (from range)' option
- Enter =Departments!A2:A
- Click 'Done'
Follow the same steps for the "Volunteers Directory"
Step 9: Enter Department Information
Begin at row 2 and add a new row for each department or ministry in your church. filling in the data under the corresponding column headers. Be sure to use consistent capitalization and formatting throughout.
Step 10: Enter Location Information
Start at row 2 and add a new row for each location, entering data into the appropriate column headers. Maintain consistent capitalization and formatting.
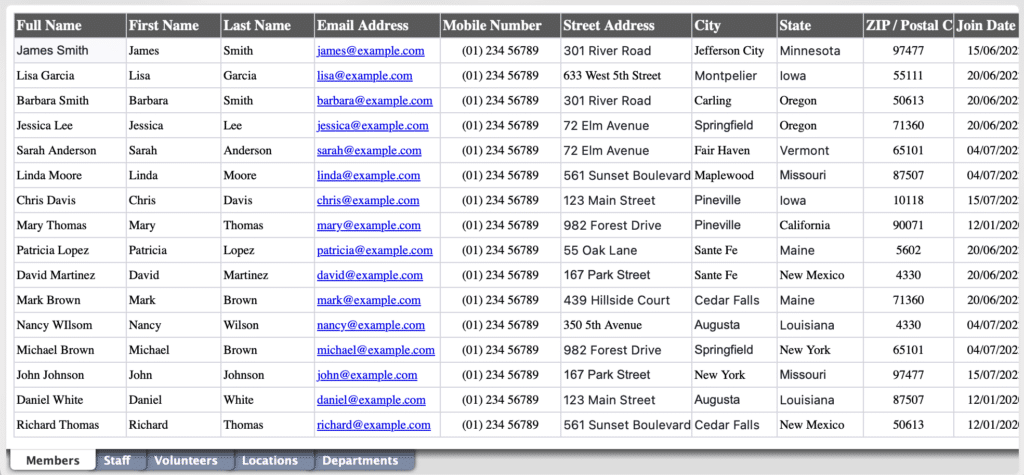
Step 11: Enter Member Information
Commence at row 2 and add a new row for each member, inputting data under the relevant column headers. Maintain consistent capitalization and formatting guidelines.
For phone numbers, use the format (XXX) XXX-XXXX. For birthdates or join dates, use MM/DD/YYYY format.
Step 12: Enter Staff Information
Begin at row 2 and add a new row for each staff member, filling in the data under the appropriate column headers. Ensure consistent capitalization and formatting throughout.
For phone numbers, use the format (XXX) XXX-XXXX
For hire dates and birthdates, use MM/DD/YYYY format.
Step 13: Enter Volunteer Information
Start at row 2 and add a new row for each volunteer, entering data into the relevant column headers. Maintain consistent capitalization and formatting.
Step 14: Filtering and Formatting
Enhance your directory's usability by applying filters and formatting:
- Add filters to allow quick searching by location, department, or alphabetically.
- Sort columns by last name or date.
- Highlight header rows and bold names.
- Wrap text and adjust column widths for clarity.
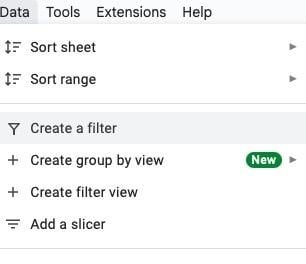
To improve your Google Sheets church directory's accessibility, activate filters by:
- Selecting the entire header row.
- Navigating to Data > “Create a filter” to enable dropdown filters for each header.
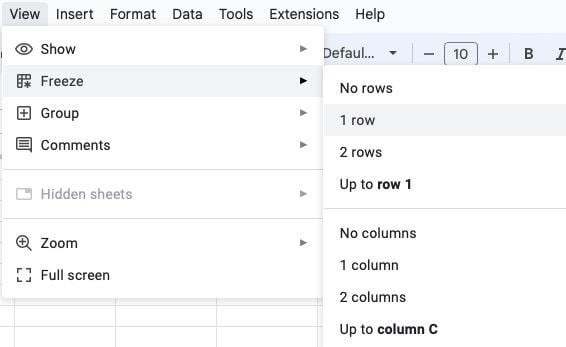
To enhance navigation in your Google Sheets church directory, lock the header and first column on all sheets:
- With the header row selected, go to View > Freeze.
- Select "Freeze 1 row."
- Next, go to View > Freeze again.
- Choose "Freeze 1 column."
Step 15: Save and Share Your Church Directory
After completing your Sheets file, save it securely. Share access with church staff who require viewing or editing privileges, ensuring sensitive information is accessible only to authorized individuals.
To grant access:
- Click the Share button.
- Add people or groups by entering their email addresses.
- Select editor or viewer permissions.
- Click Send to finalize sharing.
(Are you still with me? Much respect to you! But, I did tell you this was long... lol!)

But, now you can efficiently create and manage a comprehensive church directory in Google Sheets.
Google Sheets Directory Best Practices:
- Prioritize simplicity and clarity
- Use a clean layout with easy to read fonts
- Organize information logically, like alphabetically or by departments
- Avoid clutter and display important contact details prominently.
- Schedule updates at least once a year for new members, church staff changes and contact info.
8 Steps to Building A Church Directory With Software
Transitioning to church directory software can streamline your directory management process, making it easier for your church volunteers.

Here are some simple steps to consider when implementing a church directory using church management software.
Step 1: Choose Software
Research church management software tools. Consider their features, reviews from current churches already using them, and pricing. You can also check out our rankings of this year's best church member management tools.
Select the option that best suits you and your leadership team.
Step 2: Purchase & Install
Once you have selected a software tool that meets your church's needs and purchased the subscription, install the software on all the designated church devices.
Step 3: Set Up Admin Accounts
Create administrative accounts for the key church staff or volunteers who will manage the directory and oversee the implementation of it.
Step 4: Import Existing Data
If you have an existing church directory or church member database, import this data into the software.

Step 5: Train Staff and Volunteers
Provide training sessions for church staff and church volunteers who will be using the software. Ensure that everyone understands how to input, update, and access member information correctly.
Step 6: Launch and Promote
Officially launch your new church directory software to your church congregation! Promote its benefits, such as easier communication and enhanced community engagement!
Step 7: Regular Updates and Maintenance
Schedule regular updates for the software to ensure that all new security updates and features are up to date. Be sure to also regularly maintain and review church members information and update regularly.
Step 8: Monitor Usage and Effectiveness
Monitor how the church directory software is being used and its impact on the church operations and communication. Consistently be evaluating how effective it is at meeting your church’s goals and vision and make adjustments as needed.
Important Features of Software Directories
- Real-Time Updates and Accessibility: Keep contact details, roles, and group memberships accurate. Improve communication and coordination within your church community.
- Search and Filter Capabilities: Quickly find specific church members or groups by name, location, department, or other criteria.
- Integration with Communication Tools: Seamlessly connect with email and messaging platforms. Send personalized communications and announcements directly from the directory to church members.
- Reporting and Analytics: Gain valuable insights into church member engagement, attendance trends, and demographics. Make informed decisions on church programming, outreach strategies, and resource allocation.
- Security and Privacy Controls: Protect sensitive church member information with customizable access levels. Control access to sensitive details, keeping them secure and accessible only to your authorized church members.


Free Templates to Level Up Your Church Directory

.XLSX Directory Template
This directory spreadsheet template offers a simple way to organize your church leadership. It can help you centralize and manage your leadership data efficiently.
Printable Member Bio Page Template
While many churches have decided to forego developing printable membership directories due to the high cost and paper usage, some churches still find this physical resource useful. Below, you'll find we've created several printable, editable pages for you.
However, creating and maintaining printable membership directories can be admin-heavy. Because of this I recommend utilizing church management software (ChMS). There are several ChMS tools that my team and I recommend that actually allow users to create printable directories.


Each of these options provides support that will not only keep the maintenance of an online directory much lower but also allow for easy directory printing.

Key Leadership and Schedule Page Template
This template provides a clear view of the leadership roles, responsibilities, and schedules. It helps leaders see who handles what tasks in the church and when. This template will help streamline your leadership workflow, enhancing accountability, teamwork, and effectiveness in your church operations!

Church Directory Software Recommendations
The best industry-leading church management software tools* do a GREAT job of creating a directory that not only serves your church but also supports future growth in administrative demands. The best tools offer invaluable benefits, providing increased efficiency and connectivity with features like:
- Real-time updates
- Secure data management
- Integrated communication tools
To make an informed choice, I would encourage you to explore our guide on choosing church management software, where we break down key considerations and top options. Investing in a ChMS can be a game-changer, providing robust support as you lead and grow your congregation.
*need a free ChMS tool? We've got rankings of those as well.
Join our newsletter.
Get the latest insights, tips, and resources on church management. Sign up today and stay informed on the best tools and practices to support your church's mission!
We'd love to have you.
